Forget the thigh gap or even worrying about the size and shape of your legs. It’s strengthening your thighs that really matters. Strong inner thighs — or adductors — help improve core control (they do help make up the five muscles that attach to the pelvis, after all!) and assist in injury prevention. Thanks to their ability to counterbalance external rotation of the hip that comes from the glutes and hamstrings, they keep your knee in a more neutral position too — a benefit that’s extra clutch for runners and cyclists alike.
6 Glider Exercises for a Serious Inner Thigh Workout
Don’t have sliding disks at home? The substitution is simple. Just make sure you’re on a slick surface and grab two small towels. Then mimic these six moves for a solid inner thigh workout, as demonstrated below.
Perform each of the inner thigh exercises for eight to 10 reps, taking a 10-second break between sets. Then repeat for two to three rounds.
Tips: When doing the lower body exercises, be very aware of the standing foot on the floor. Feel the toes, the pinky edge of the foot and weight in the heel. Always engage the core muscles by drawing the belly button back and ‘closing’ the ribs. Not only will your legs feel the heat, but your abdominals and even your shoulders will fire up, too.
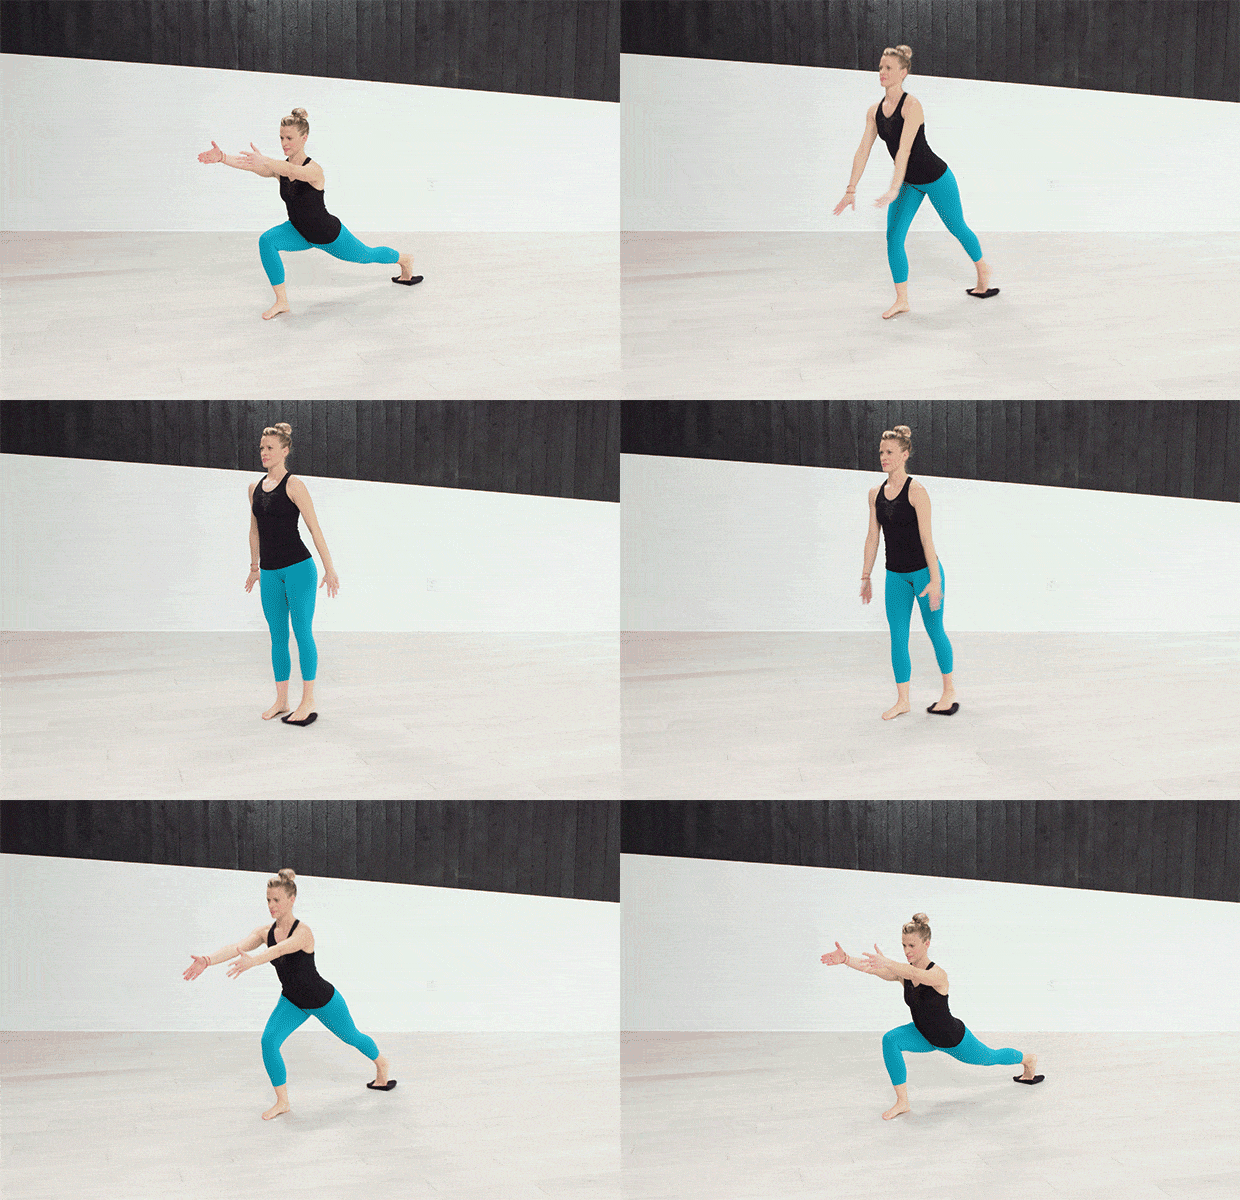
1. Low Lunge
How to: Start standing with your feet hip-width apart, your right foot on the glider and your left foot planted firmly on the floor
(a). Slide your right foot straight back behind you, as you bend your left knee to 90 degrees, knee over your ankle. At the same time, bring arms straight up to shoulder height
(b). Driving into the floor of your left heel, slide your right foot forward and come back up to stand
(c). Repeat, then switch sides.
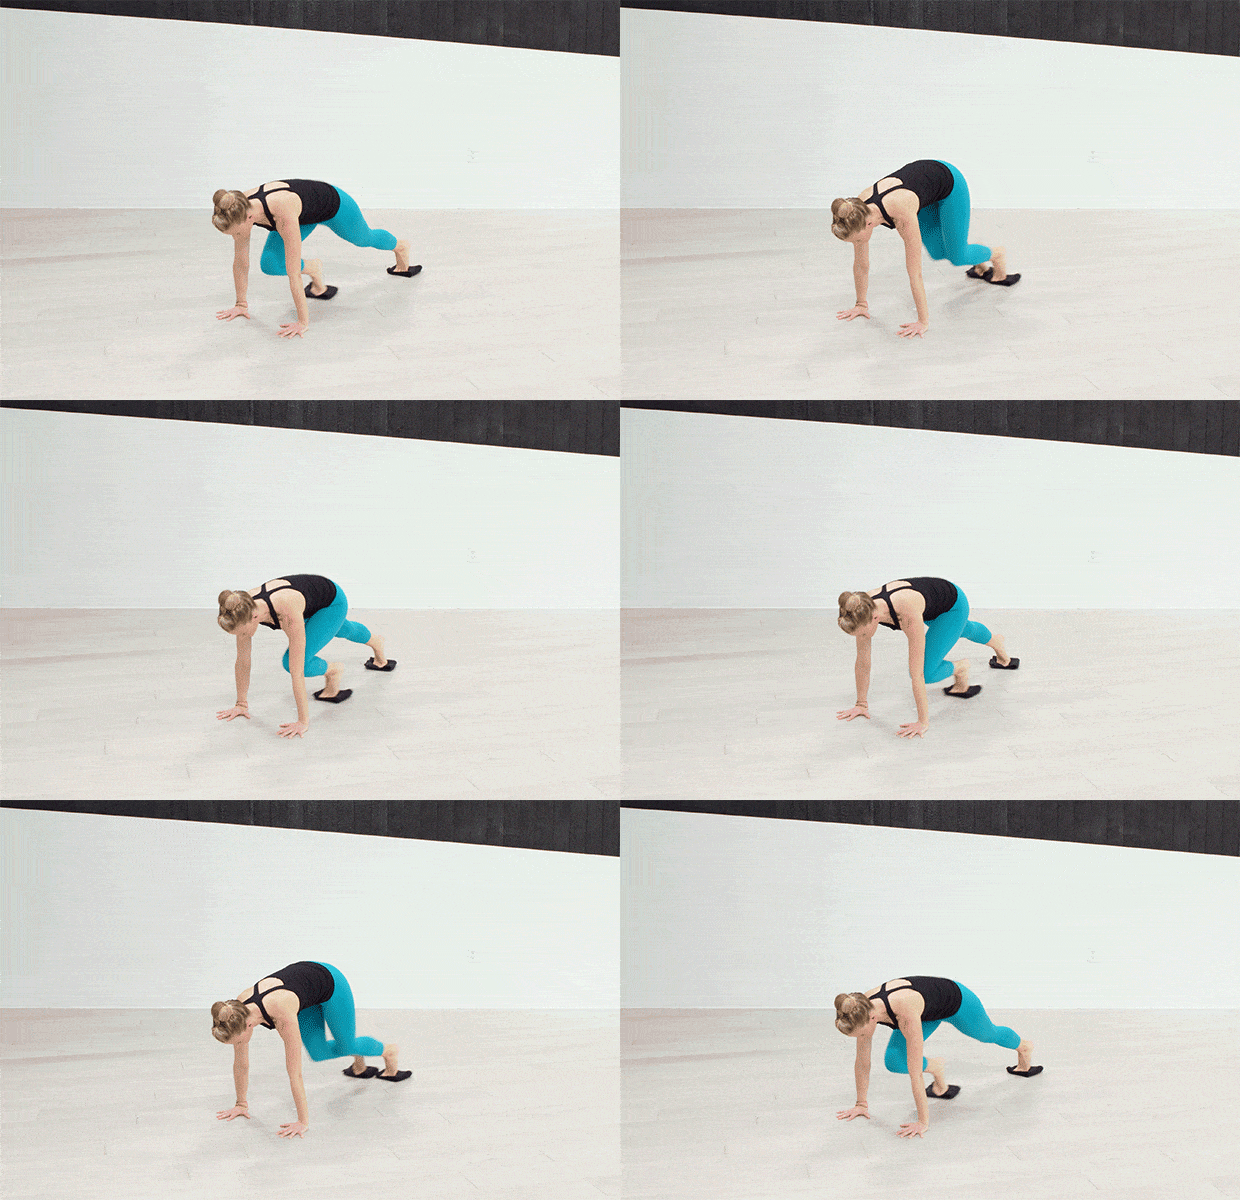
2. Mountain Climbers
How to: Start in a high plank position, shoulders over wrists and forming a straight line from shoulders to ankles. Both feet should be on gliders
(a). Drive your right knee in toward your chest, then slide it directly back to plank
(b). Drive your left knee in toward your chest, then slide it directly back to plank
(c). Continue alternating, moving with control and maintaining a strong plank position.
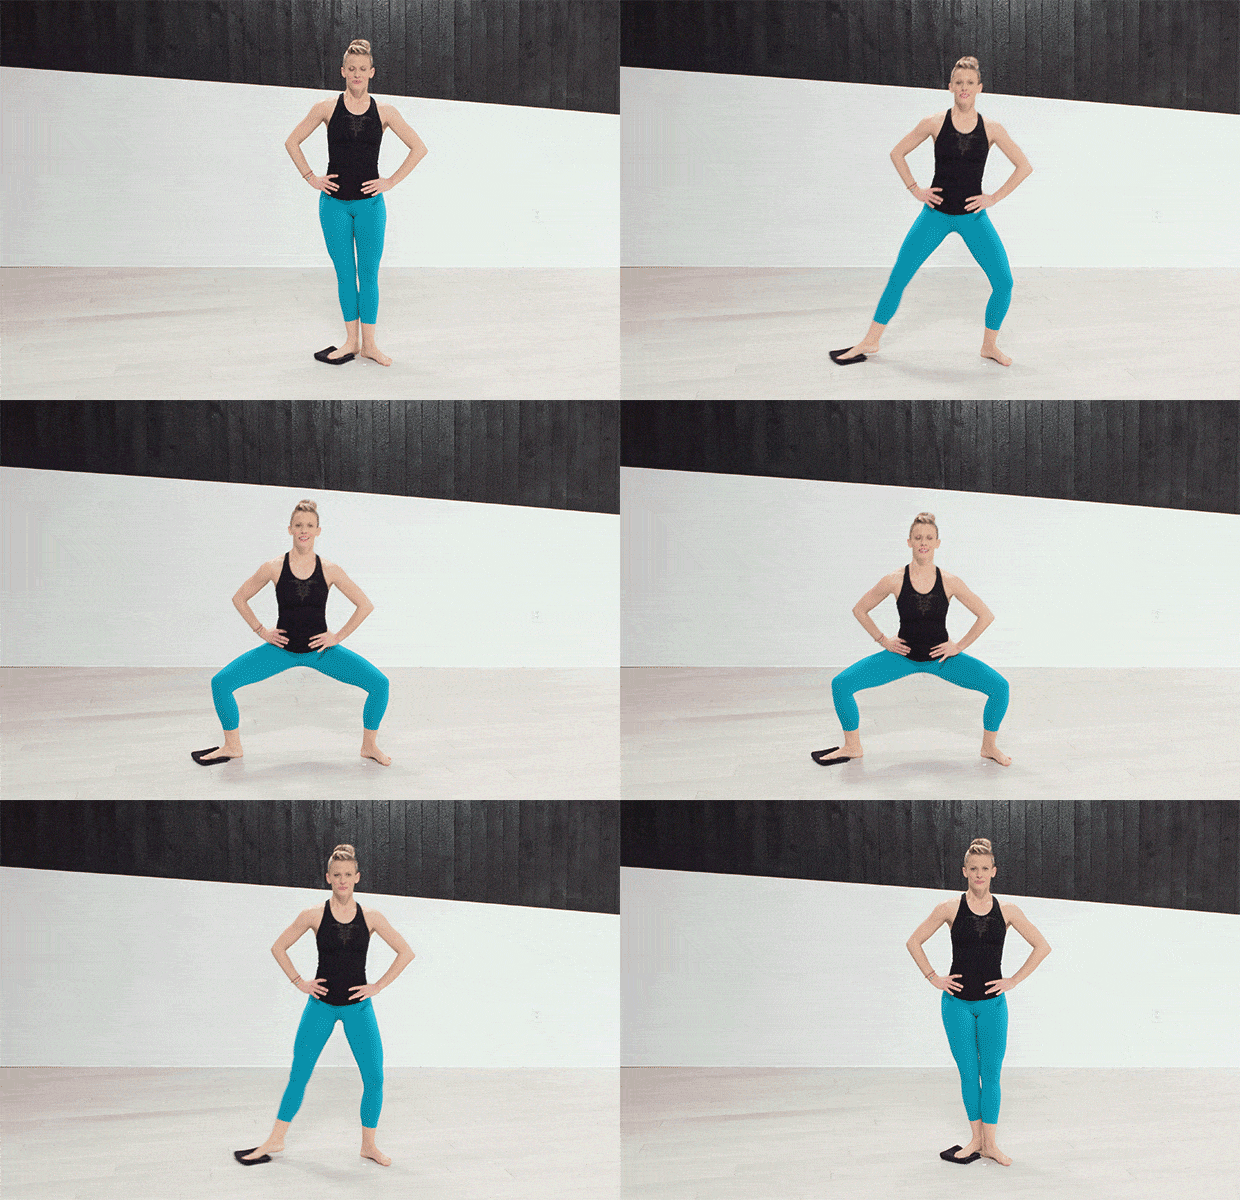
3. 1st to 2nd Plie Glide
How to: Start standing with feet together, heels touching and toes pointing slightly outward. Right foot on a glider and your left planted firmly on the floor
(a). Slide your right foot out a little wider than hip-width and drop your hips down to form a sumo squat position. Shoulders stay over your hips and knees over ankles
(b). Push off your right foot and squeeze your thighs together to come back up to stand, bringing your right foot back to touch your left
(c). Repeat, then switch sides.
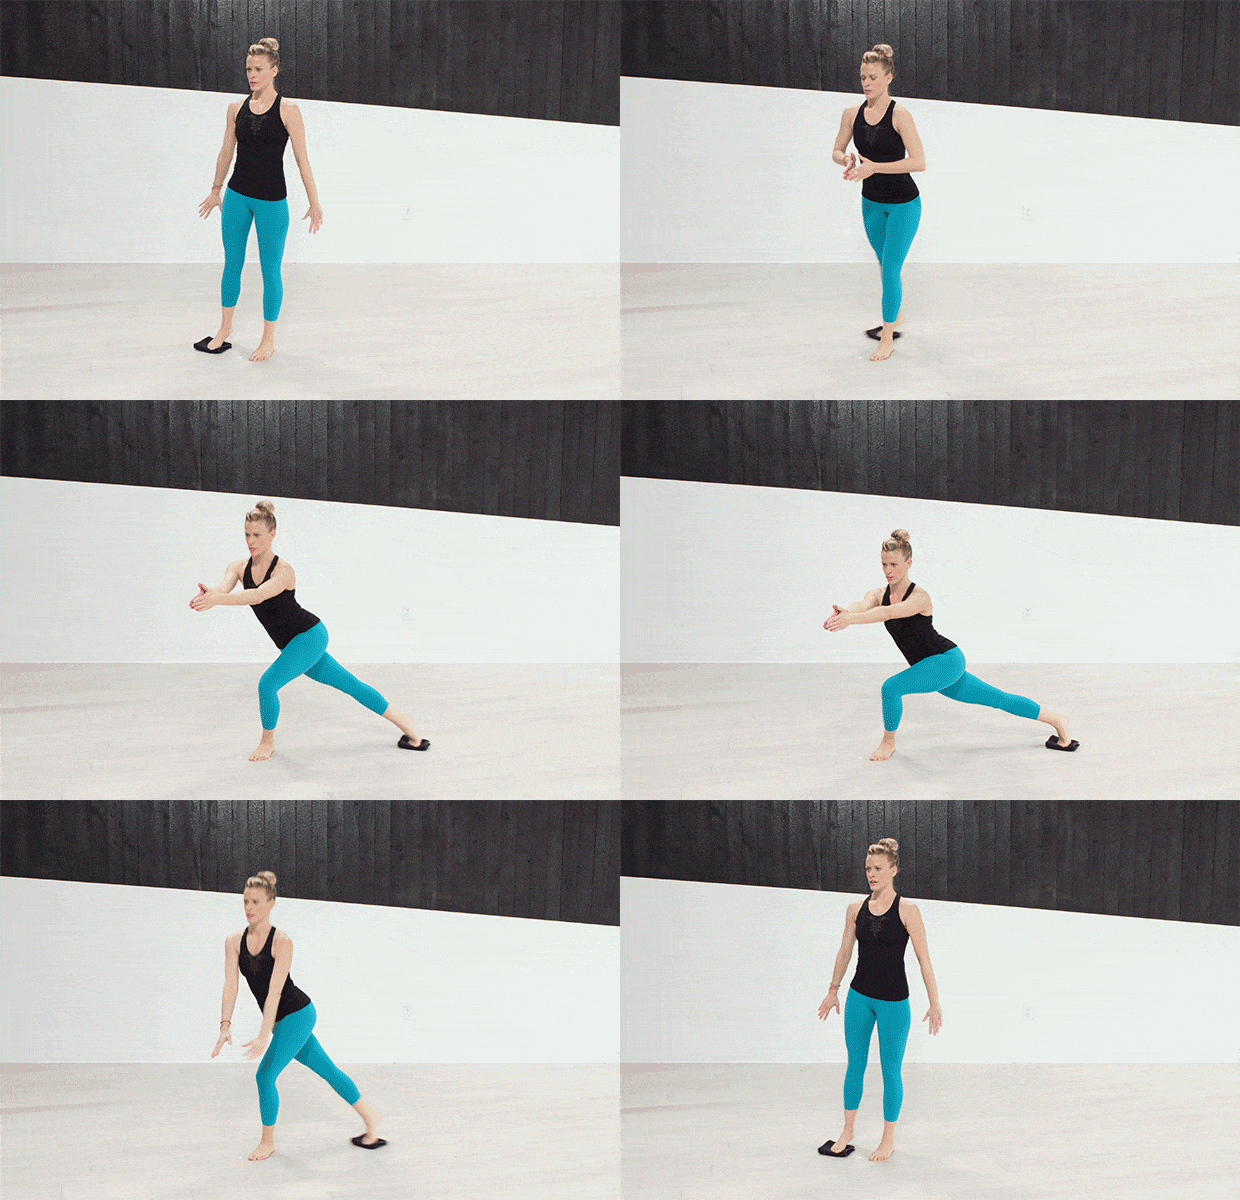
4. Curtsy Lunge
How to: Start standing with your feet hip-width apart, your right foot on the glider and your left foot planted firmly on the floor
(a). Slide your right foot back behind you on a diagonal, as you bend your left knee to 90 degrees, knee over your ankle. At the same time, bring arms straight up to shoulder height. Your hips should stay square to the front
(b). Driving into the floor of your left heel, slide your right foot forward and come back up to stand
(c). Repeat, then switch sides.

5. Plank Rainbow Leg
How to: Start in a high plank position, shoulders over wrists and forming a straight line from shoulders to ankles. Place your right foot on the glider
(a). Slide your right foot forward to the outside of your right hand, keeping both legs straight and maintaining a solid plank position
(b). Pause, then slide it back to plank position
(c). Repeat, then switch sides.
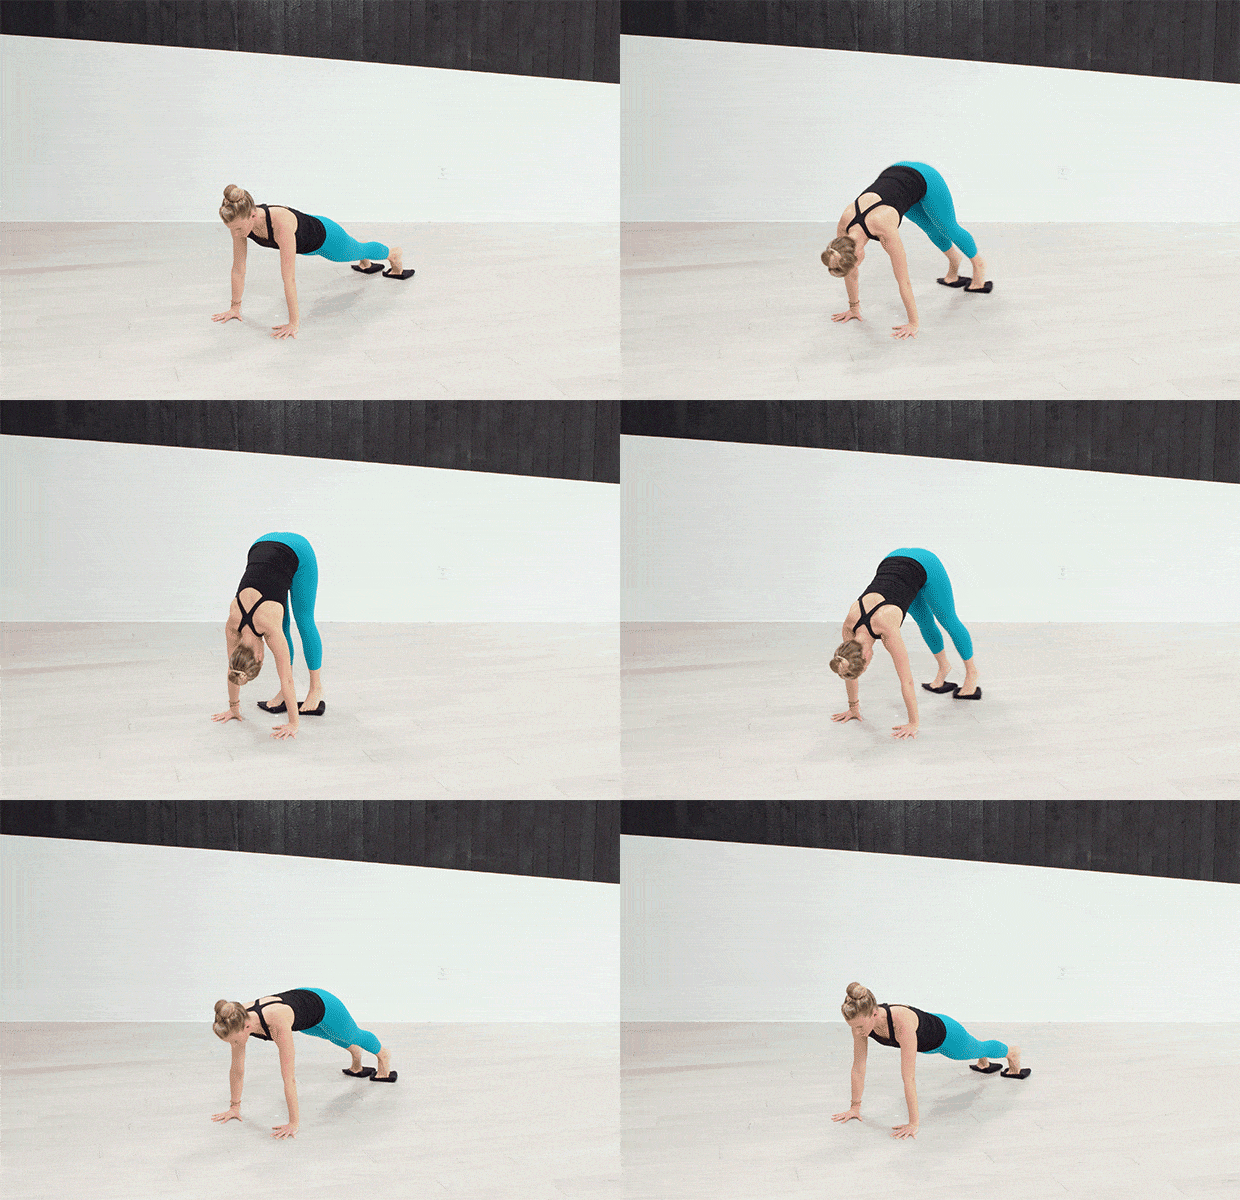
6. Pike Plank
How to: Start in a high plank position, shoulders over wrists and forming a straight line from shoulders to ankles. Both feet should be on gliders, with legs together
(a). Keeping your shoulders over your wrists and legs straight, pike your hips up, using your abs to pull your feet toward your hands
(b). Slide both feet back to plank position
(c). Repeat.
P.S. Like and share this post on social media. Please fill out your details below and click on the subscribe button below to get our newsletter with updated articles in your inbox.


